Posts

Showing posts from July, 2013

C Programming in Mac OS X

Image
Programming C in Mac OS X requires you to install Xcode. Fortunately, this development tool is available free. Go to your App Store and search for Xcode. Install Xcode by clicking on " Free " or " Install ". Please note that the installation will take quite some time. There are two methods of writing and compiling a C program. The first method is using Xcode and the second method is using command line. Both methods require installation of Xcode. Using Command Line  To use command line to compile a C program, we need to enable gcc (or llvm-gcc). Under Xcode, select Xcode >> Preferences ,  click on the Downloads tab. You should see a line " Command Line Tools ". Click on the install button on the right. Close Xcode when you are done. You can use TextEdit to create a simple C program. Alternatively, you can also use vim from the Terminal. Open the Terminal and navigate to the folder you would like to store the program. C
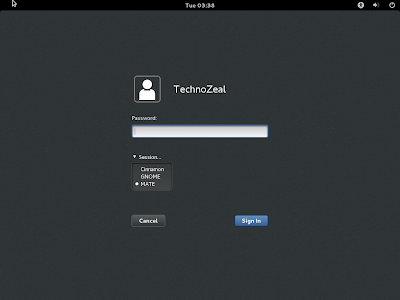
Install Mate Desktop with Compiz on Fedora 19

Image
Update: For installation on Fedora 20 , please refer to Install Mate Desktop with Compiz on Fedora 20 . This is the installation guide to install Mate Desktop with Compiz on top of existing GNOME Desktop or Cinnamon Desktop. If you prefer a clean Mate Desktop, please refer to the post Install Fedora 19 Mate Compiz Spin . Actually,  I intended to use the Mate Compiz Spin as my main desktop environment, however, I encountered some minor but annoying issues. The main problem is after logging in, it takes a long while for the desktop to show. Other minor issues like lack of applications can be resolved by installing the additional applications manually. After installing Mate Desktop on the existing GNOME/Cinnamon desktop environment, the desktop shows seconds after login. There is no lack of applications, in fact there are some duplicate applications, but this doesn't bothers me. Please note that you need additional hard disk space to install Fedora 19 with Cinnamon and Mate

Install Fedora 19 using Netinstall

Image
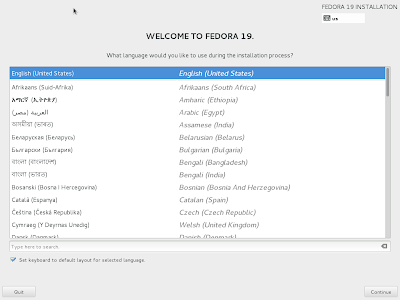
Update: For Fedora 20, refer to Install Fedora 20 using Netinstall . This is the procedure for installing Fedora 19 using NetInstall method. For full installation of Fedora 19 on a computer, please refer to Installation Guide for Fedora 19 . For installation of Fedora 19 on virtual machine, please refer to  Install Fedora 19 on VirtualBox with Guest Additions . For Compiz fan, please refer to the post  Install Fedora 19 Mate Compiz Spin . This method allows you to download and install the latest software package from the repository, there is no need for software update after installation. Please note that it will take longer time for the installation to complete because the installer need to download every single package during installation. I usually use this method to install minimal Fedora 19 on a virtual machine since it does not take up very much hard disk space and memory. Creation of Media or Setting Up VirtualBox For creating a bootable USB, please refer to the off

Install Fedora 19 Mate Compiz Spin

Image
The following guide contains the installation procedure for  Fedora 19 Mate Compiz Spin . This procedure was tested on a HP laptop with dual core AMD processor and 4GB of RAM using a USB external hard disk. I boot Fedora 19 from a USB stick and install the entire OS on an external (USB) hard disk. Depending on your hardware, it is not advisable to install Mate Compiz spin in a virtual machine if your hardware could not support it. For installation of original Fedora 19, please refer to Installation Guide for Fedora 19 . For installing fedora 19 on virtual machine, please refer to Install Fedora 19 on VirtualBox with Guest Additions . For netinstall, refer to Install Fedora 19 using Netinstall . Creation of Boot Media You can download the Mate Compiz Spin from here . You can e xplore other custom spins here . The procedure on creating bootable USB can be found on the  official Fedora documentation here . For details of creating a bootable USB drive, please  refer to my post