Posts

Showing posts from July, 2018

Secure Screen Sharing with Linux Ubuntu 18.04 LTS

Image
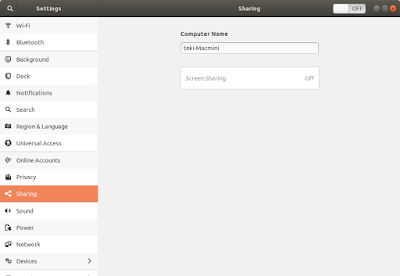
To share screen from Ubuntu Workstation securely, we need to configure the pre-installed VNC server Vino and then we also need to install ssh server if we have not already done so.  Server side configuration are as follows: Configure Vino server Install and configure ssh server  We have 2 methods of launching VNC client. They are as follows: Method 1 Established ssh connection over VNC port Launch VNC client over ssh tunnel Method 2 Using a VNC client that can perform both at the same time. Server Side Configuration Configure Vino Server Please refer to this post. Simple Screen Sharing with Linux Ubuntu 18.04 LTS Install and Configure SSH Server Please refer to this post Install and Configure SSH Server on Linux Client Side Connection Method 1A: Launching VNC from Linux/Mac OS X Established SSH Tunnel from Client At this point we assume that we have installed and tested the ssh server. To established secure ssh tunnel over

Simple Screen Sharing on Linux Ubuntu 18.04 LTS

Image
Ubuntu already has a VNC server Vino  pre-installed. So no additional VNC server installation is required. Configuring VNC Server To share screen from Ubuntu, we need to perform a few steps: To share screen go to Settings > Sharing Turn ON the OFF button on the top right corner Click on Screen Sharing . Turn ON the OFF button on the top left corner and set a password. Resulting screen is as follows: Once it is completed. We need additional command line to configure so that it works. Apparently, the default encryption does not work well will any VNC client. To get VNC to accept incoming connection, open a terminal and execute the following command: gsettings set org.gnome.Vino require-encryption false Once this setting is done, we have one more step to do before we are good to go.  We need to enable auto-login so that screen sharing can work. Go to Settings > Details > Users On the top right corner, click Unlock and enter your password

Install and Configure SSH Server on Linux

Update: 3 Aug 2018 We have included additional systemd command and also command to install ssh in Fedora Install SSH on Ubuntu  We are using Ubuntu 18.04 LTS Workstation, SSH was not installed by default.  Use the following command to install OpenSSH server: Update System We need to update the system before starting to install SSH server. use the command below: sudo apt-get update sudo apt-get upgrade Install OpenSSH Server To install OpenSSH server use the command below: sudo apt install -y openssh-server Install SSH on Fedora Update System Before installation, perform a system update first: sudo dnf update Install OpenSSH Server To install OpenSSH server use the command below: sudo dnf install -y openssh-server Configure SSH with Systemd Check SSH Services To check if ssh daemon is running, use the command: sudo systemctl status sshd Starting SSH  To start the service use the command below: sudo systemctl start sshd

Revive Old Mac Mini (2009) with Linux

Image
We have an old Mac Mini (late 2009 version) lying around. The latest Mac OS X it could support was Mac OS X El Capitan. The machine is still good although the DVD drive does not worked anymore.  Apple will drop security update for El Capitan very soon. Running OS X El Capitan without any security update is not an option.  Instead of disposing a good piece of hardware, we can install Linux. However, before we start playing around with the Linux installation, we need to take stock of the hardware capability. We might need to upgrade some hardware so that we can run Linux smoothly. Mac Mini 2009 Specification This Mac has Core 2 Duo CPU (P8700) running at 2.53GHz. It support PC3-8500 DDR3 RAM running at 1066MHz. This Mac Mini has a Nvidia Geforce 9400M video card. It support 2 display output. Wifi specification is 802.11a/b/g/n. This is pretty high end at the time.  However, this WiFi uses Broadcom chipset (BCM4321), which is not very well supported in Linux since it