Install MX Linux on Mac Mini (late 2009)
We manage to install MX Linux successfully without any modification on the drivers. After installation, we just need to add our desired software.
The only concern is that MX Linux uses System V instead of Systemd. While MX uses init.d to kick start servcies, systemd was installed but disabled in the background. This cause confusion when we install some software packages. These software packages detects systemd was installed and configure the software services using systemd file. This scenario happened when we try to installed RealVNC server. There're workaround to resolved this issue.
The only concern is that MX Linux uses System V instead of Systemd. While MX uses init.d to kick start servcies, systemd was installed but disabled in the background. This cause confusion when we install some software packages. These software packages detects systemd was installed and configure the software services using systemd file. This scenario happened when we try to installed RealVNC server. There're workaround to resolved this issue.

Preparing USB
We download MX Linux iso image from the website. MX Linux is a variant of Debian. Once we downloaded the image, we burn the iso image to USB using Etcher. For those who need a tutorial for burning image to USB please refer to the Ubuntu tutorial.
Installing MX Linux
Once we booted into the live image, we can test the OS without installing the system. To install MX, double click the installation icon on the top left corner.

Once the installation wizard is launched, the following screen will appear:

Click Next to proceed.

Select the target drive in 1a. We can use partition tools to remove old partition if we are using an existing drive.

A pop-up will ask if it is ok to format the entire disk. Click Yes.

The system will start installing files. Once the files are copied and installed, the following screen will appear.

The system ask us to select the boot method. Select ESP for Mac Mini system. Click Next.

A pop-up will appear asking to confirm the location of bootloader. Click Yes.

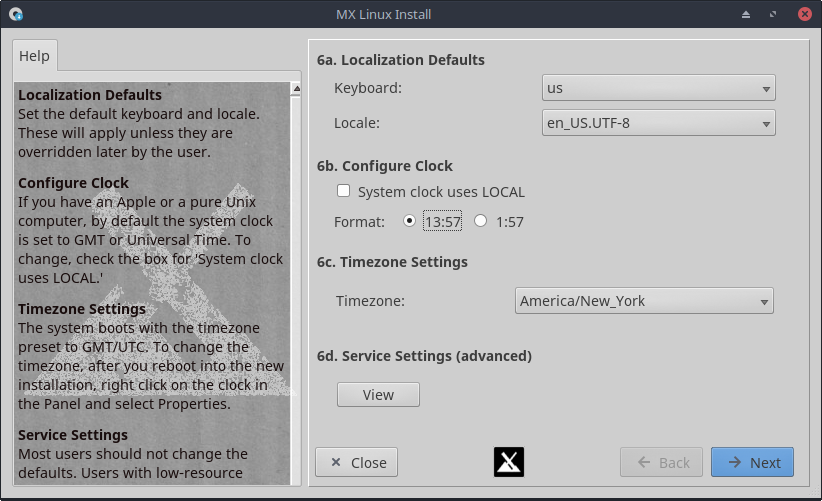
The screen above allow us to set the keyboard layout, time format, time zone and we can also enable or disable services. Click Next when ready.


A pop-up appear for us to confirm reboot. Reboot the system when ready.
Post Installation Setup
System Update
To perform system update, we can use the software app or use the following command:
sudo apt update
sudo apt-get upgrade
Please note that software upgrade could not be perform from the command line. Use the software update app instead.
Installing Chrome
Google Chrome website and download Chrome. Next, open a terminal and navigate to where the downloaded package is located. Use the command:
sudo apt install ./<google-chrome-packages.deb>
Installing OpenSSH Server
sudo apt-get install openssh-server
System V vs Systemd
Systemd was installed in MX Linux but it was disabled by default. MX Linux still reply on System V to manage software services. This does not create much problem except that some software packages created the systemd file instead of init script.We can boot into MX Linux with systemd enabled by choosing an image with systemd enabled from the boot loader. However, MX Linux with systemd is not quite stable and it hangs a few time.
Install RealVNC
We have a problem when installing RealVNC. Please refer to our post Install RealVNC on MX Linux for work around solution.Related Post
Please also check out the main post on re-purposing old Mac Mini. This post also include the installation of Ubuntu on Mac Mini. We have also include hardware specification and other consideration in the main post.
Please also check out the summary result of testing various Linux distribution on Mac Mini (late 2009).
Install Linux on Mac Mini (late 2009) Result Summary
***
Install Linux on Mac Mini (late 2009) Result Summary
***


Comments
Post a Comment